Posting insightful information thus encompassing everything technical to assist in the enlightenment of others!
Friday, August 19, 2016
Configure High-Avaliablity Cluster on CentOS 7 / RHEL 7
Configure High-Avaliablity Cluster on CentOS 7 / RHEL 7
High-Availability cluster aka Failover-cluster (active-passive cluster) is one of the most widely used cluster types in the production environment, this cluster provides you the continued availability of services even one of the node from the group of computer fails. If the server running an application has failed for some reason (hardware failure), cluster software (pacemaker) will restart the application on another node.
Mostly in production, you can find this type of cluster is mainly used for databases, custom application and also for file sharing. Fail-over is not just starting an application, it has some series of operations associated with it; like mounting filesystems, configuring networks and starting dependent applications.
CentOS 7 / RHEL 7 supports Fail-over cluster using the pacemaker, we will be looking here about configuring the apache (web) server as a highly available application. As I said, fail-over is a series of operations, so we would need to configure filesystem and networks as a resource. For a filesystem, we would be using a shared storage from iSCSI storage.
Our Environment:
Configure High-Availability Cluster on CentOS 7 – Infrastructure
Cluster Nodes:
node1.itzgeek.local 192.168.12.11
node2.itzgeek.local 192.168.12.12
iSCSI Storage:
server.itzgeek.local 192.168.12.20
All nodes are of CentOS Linux release 7.2.1511 (Core), running on VMware workstation.
Building Infrastructure:
iSCSI shared storage:
Shared storage is one of the important resources in the high-availability cluster, it holds the data of a running application. All the nodes in a cluster will have access to shared storage for recent data, SAN is the most widely used shared storage in the production environment; here, we will configure a cluster with iSCSI storage for a demonstration purpose.
Here, we will create 10GB of LVM disk on the iSCSI server to use as a shared storage for our cluster nodes. Let’s list the available disks attached to the target server using the command.
[root@server ~]# fdisk -l | grep -i sd
 Disk /dev/sda: 107.4 GB, 107374182400 bytes, 209715200 sectors
 /dev/sda1   *        2048     1026047      512000   83  Linux
 /dev/sda2         1026048   209715199   104344576   8e  Linux LVM
 Disk /dev/sdb: 10.7 GB, 10737418240 bytes, 20971520 sectors
From the above output, you can see that my system has a 10GB of disk (/dev/sdb). Create an LVM with /dev/sdb (replace /dev/sdb with your disk name)
List down the hard disks attached to nodes, you would find a new disk (sdb) added to the node; run below command on both nodes.
# fdisk -l | grep -i sd
Disk /dev/sda: 107.4 GB, 107374182400 bytes, 209715200 sectors
/dev/sda1   *        2048     1026047      512000   83  Linux
/dev/sda2         1026048   209715199   104344576   8e  Linux LVM
Disk /dev/sdb: 10.7 GB, 10733223936 bytes, 20963328 sectors
Format the newly detected disk with ext4.
[root@node1 ~]# mkfs.ext4 /dev/sdb
Setup Cluster Nodes:
Make a host entry on each node for all nodes, the cluster will be using the host name to communicate each other. Perform below tasks on all of your cluster nodes.
Install cluster packages (pacemaker) on all nodes using below command.
# yum install pcs fence-agents-all -y
Allow all high availability application on the firewall to have a proper communication between nodes, you can skip this step if the system doesn’t have firewalld installed.
Use below command to get the status of the cluster.
[root@node1 ~]# pcs cluster status
Cluster Status:
 Last updated: Fri Mar 25 11:18:52 2016         Last change: Fri Mar 25 11:16:44 2016 by hacluster via crmd on node1.itzgeek.local
 Stack: corosync
 Current DC: node1.itzgeek.local (version 1.1.13-10.el7_2.2-44eb2dd) - partition with quorum
 2 nodes and 0 resources configured
 Online: [ node1.itzgeek.local node2.itzgeek.local ]

PCSD Status:
  node1.itzgeek.local: Online
  node2.itzgeek.local: Online
Run the below command to get a detailed information about the cluster including its resources, pacemaker status and nodes details.
[root@node1 ~]# pcs status
Cluster name: itzgeek_cluster
WARNING: no stonith devices and stonith-enabled is not false
Last updated: Fri Mar 25 11:19:25 2016          Last change: Fri Mar 25 11:16:44 2016 by hacluster via crmd on node1.itzgeek.local
Stack: corosync
Current DC: node1.itzgeek.local (version 1.1.13-10.el7_2.2-44eb2dd) - partition with quorum
2 nodes and 0 resources configured

Online: [ node1.itzgeek.local node2.itzgeek.local ]

Full list of resources:


PCSD Status:
  node1.itzgeek.local: Online
  node2.itzgeek.local: Online

Daemon Status:
  corosync: active/enabled
  pacemaker: active/enabled
  pcsd: active/enabled
Fencing Devices:
The fencing device is a hardware / software device which helps to disconnect the prob;em node by resetting node / disconnecting shared storage from accessing it. My demo cluster is running on top of VMware Virtual machine, so I am not showing you a fencing device setup, but you can follow this guideto setup a fencing device.
Preparing resources:
Apache Web Server:
Install apache server on both nodes.
# yum install -y httpd wget
Edit the configuration file.
# vi /etc/httpd/conf/httpd.conf
Add below content at the end of file on all your cluster nodes.
<Location /server-status>
  SetHandler server-status
  Order deny,allow
  Deny from all
  Allow from 127.0.0.1
</Location>
Now we need to use shared storage for storing the web content (HTML) file. Perform below operation in any one of the node.
[root@node2 ~]# mount /dev/sdb /var/www/
[root@node2 ~]# mkdir /var/www/html
[root@node2 ~]# mkdir /var/www/cgi-bin
[root@node2 ~]# mkdir /var/www/error
[root@node2 ~]# restorecon -R /var/www
[root@node2 ~]# cat <<-END >/var/www/html/index.html
<html>
<body>Hello This Is Coming From ITzGeek Cluster</body>
</html>
END
[root@node2 ~]# umount /var/www
Allow apache service in the firewall on all nodes.
Create an IP address resource, this will act a virtual IP for the apache. Clients will use this ip for accessing the web content instead of individual nodes ip.
Since we are not using fencing, disable it (STONITH). You must disable to start the cluster resources, but disabling STONITH in the production environment is not recommended.
# pcs property set stonith-enabled=false
Check the status of the cluster.
[root@node1 ~]# pcs status
Cluster name: itzgeek_cluster
Last updated: Fri Mar 25 13:47:55 2016          Last change: Fri Mar 25 13:31:58 2016 by root via cibadmin on node1.itzgeek.local
Stack: corosync
Current DC: node2.itzgeek.local (version 1.1.13-10.el7_2.2-44eb2dd) - partition with quorum
2 nodes and 3 resources configured

Online: [ node1.itzgeek.local node2.itzgeek.local ]

Full list of resources:

 Resource Group: apache
     httpd_vip  (ocf::heartbeat:IPaddr2):       Started node1.itzgeek.local
     httpd_ser  (ocf::heartbeat:apache):        Started node1.itzgeek.local
     httpd_fs   (ocf::heartbeat:Filesystem):    Started node1.itzgeek.local

PCSD Status:
  node1.itzgeek.local: Online
  node2.itzgeek.local: Online

Daemon Status:
  corosync: active/enabled
  pacemaker: active/enabled
  pcsd: active/enabled
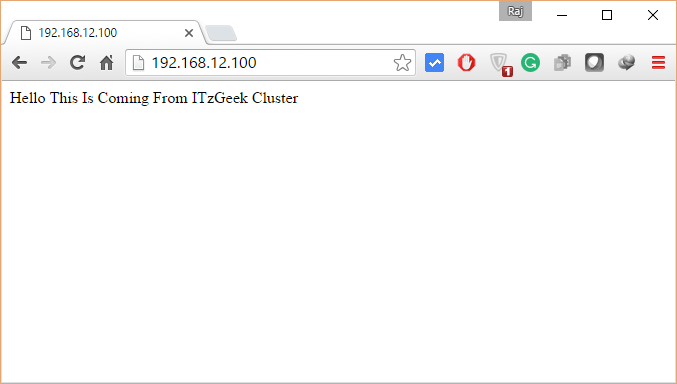
Once the cluster is up and running, point a web browser to the apache virtual-ip, you should get a web page like below.
Configure High-Availability Cluster on CentOS 7 – Apache Web Server
Let’s check the fail over of resource of the node by stopping the cluster on the active node.


No comments:
Post a Comment