Views are a very useful feature of relational technology in general, and Microsoft SQL Server specifically. They are wonderful tools that ease data access and system development when used prudently. Furthermore, views are simple to create and implement. But unfortunately most users do not adhere to a systematic and logical approach to view creation. This causes the advantages of views to become muddled and misunderstood. As you read this article you will find that views are very useful when implemented wisely, but can be an administrative burden if implemented without planning. View Overview Before discussing how best to implement views, let's review the basics of views. All operations on a SQL Server table result in another table. This is a requirement of the relational model and is referred to as relational closure. A view is basically the relational model's way of turning a SELECT statement into a "table" that is accessible using SQL. Therefore, a view can be considered a logical table. No physical structure is required of a view; it is a representation of data that is stored in other tables. The data "in the view" is not stored anywhere and only physically exists in the underlying tables. Views can also be based on other views. For clarification, refer to Figure 1. Figure 1. View Composition 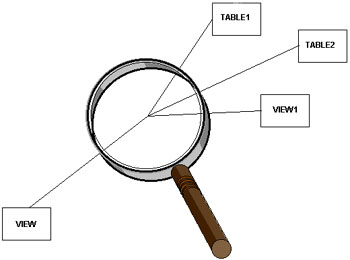 Views are very flexible. They can consist of any combination of the following:
When modifying data through a view (that is, using INSERT or UPDATE statements) certain limitations exist depending upon the type of view. Views that access multiple tables can only modify one of the tables in the view. Views that use functions, specify DISTINCT, or utilize the GROUP BY clause may not be updated. Additionally, inserting data is prohibited for the following types of views:
Almost any SQL that can be issued natively can be coded into a view; there are exceptions, however. For example, the UNION operator can not be used in a view and you cannot create a trigger on a view. All of the basic DDL statements can be used to create and manage views including CREATE, DROP, and ALTER. The text of any view can be retrieved from the SQL Server system catalog using the system procedure sp_helptext (unless the view was created specifying WITH ENCRYPTION). For example, this statement: sp_helptext Sample_view Might return the following output: TextCREATE VIEW Sample_View AS SELECT title, au_fname, au_lname FROM titles, titleauthor, authors WHERE titles.title_id=titleauthor.title_id AND authors.author_id=titleauthor.author_id It is also possible to rename a view using the system procedure sp_rename. View Implementation Rules Understanding the basic features of views will provide a framework for you to develop rules governing view usage. This section provides the rules of thumb for when it is wise to create views. Guidelines such as these should be instituted within your organization to reduce the amount of time and effort required to implement effective views. The following rules will ensure that views are created in a responsible and useful manner at your shop. These rules were developed over a number of years as a result of implementing large relational databases in many different environments. There may be more uses for views than are presented here, so do not needlessly fret if you do not see your favorite use for views covered in this article—unless you blindly use base table views. There is no adequate rationale for enforcing a strict rule of one—view per base table for SQL Server application systems. In fact, the evidence supports not using views in this manner. There are three basic view implementation rules:
The View Usage Rule The first rule is the view usage rule. Simply stated, your view creation strategy should be goal-oriented. Views should be created only when they achieve a specific, reasonable goal. Each view should have a specific application or business requirement that it fulfills before it is created. That requirement should be documented somewhere, preferably in a data dictionary or repository. Although this rule seems obvious, views are implemented at some shops without much thought as to how they will be used. This can cause the number of views that must be supported and maintained to continually expand until so many views exist that it is impossible to categorize their uses. There are seven primary uses for which views excel. These are:
Security One of the most beneficial purposes served by views is to extend the data security features of SQL Server. Views can be created that provide a subset of rows, a subset of columns, or a subset of both rows and columns from the base table. How do views help provide row and column level security? Consider an EMPLOYEE table that contains all of the pertinent information regarding an enterprise's employees. Typically, name, address, position, birth date, hire date, and salary information would be contained in such a table. However, not every user will require access to all of this information. Specifically, it may become necessary to shield the salary information from most users. This can be done by creating a view that does not contain the salary column and granting most users the ability to access the view, instead of the base table. Similarly, row level security may be necessary. Consider a table that contains project information. Typically this would include project name, purpose, start date, and who is responsible for the project. Perhaps the security requirements of the projects within your organization deem that only the employee who is responsible for the project can access their project data. By storing the login id of the responsible employee in the PROJECT table, a view can be created using the USER special register such as the one shown below:
The USER_NAME() function returns the login id of the user initiating the request. So, if user Sammy issues a SELECT statement against the MY_PROJECTS view, only rows where the RESPONSIBLE_EMP is equal to "Sammy" will be returned. This is a fast and effective way of instituting row level security. By eliminating restricted columns from the SELECT list and providing the proper predicates in the WHERE clause, views can be created to allow access to only those portions of a table that each user is permitted to access. Efficient Access Views can also be used to ensure optimal access paths. By coding efficient predicates in the view definition SQL, efficient access to the underlying base tables can be guaranteed. The use of proper join criteria and predicates on indexed columns can be coded into the view. For example, consider the following view:
WHERE D.DEPTNO=E.WORKDEPT By coding the appropriate join criteria into the view definition SQL you can ensure that the correct join predicate will always be utilized. Complexity Somewhat akin to coding appropriate access into views, complex SQL can be coded into views to mask the complexity from the user. This can be extremely useful when your shop employs novice SQL users (whether those users are programmers, analysts, managers, or typical end users). Consider a database that tracks projects and each individual activity for the project. The following rather complex SQL implements relational division:
This query uses correlated subselects to return a list of all projects in the PROJACT table that require every activity listed in the ACT table. By coding this SQL into a view called, say ALL_ACTIVITY_PROJ, then the end user need only issue the following simple SELECT statement instead of the more complicated query:
Now isn't that a lot simpler? Derived Data Another valid usage of views is to ensure consistent derived data by creating new columns for views that are based upon arithmetic formulae. For example, creating a view that contains a column named TOTAL_COMPENSATION which is defined by selecting SALARY + COMMISSION + BONUS is a good example of using derived data in a view. Domain Support It is a sad fact of life that there are no commercial relational database management systems that support domains; and SQL Server is no exception. Domains are an instrumental component of the relational model and, in fact, were in the original relational model published in 1970 — almost 30 years ago! Although the purpose of this article is not to explain the concept of domains, a quick explanation is in order. A domain basically identifies the valid range of values that a column can contain.1 Some of the functionality of domains can be implemented using views and the WITH CHECK OPTION clause. The WITH CHECK OPTION clause ensures the update integrity of SQL Server views. This will guarantee that all data inserted or updated using the view will adhere to the view specification. For example, consider the following view:
The WITH CHECK OPTION clause, in this case, ensures that all updates made to this view can specify only the values 'M' or 'F' in the SEX column. Although this is a simplistic example, it is easy to extrapolate from this example. Your organization might create views with predicates that specify code ranges using BETWEEN, patterns using LIKE, and a subselect against another table to identify the domain of a column. A word of caution however: when inserts or updates are done using these types of views, SQL Server will evaluate the predicates to ensure that the data modification conforms to the predicates in the view. Be sure to perform adequate testing prior to implementing domains in this manner to be safeguard against possible performance degradation. Column Renaming As you can tell from looking at the sample views shown in the other sections, you can rename columns in views. This is particularly useful if a table contains arcane or complicated column names. Consider the following view:
Not only have we renamed the entity from ACCT to the more easily understood name, ACCOUNT, but we have also renamed each of the columns. Isn't it much easier to understand ACCT_TYPE than ACTP, or ACCT_OPEN_DATE than ACOD? Of course, this is a contrived example with very awkward column names, but I have seen worse in actual production systems. Whenever tables exist with clumsy table and/or column names, views can provide an elegant solution to renaming without having to drop and recreate anything. Single Solution Views The final view usage situation might actually be the most practical usage for views—when views are the only solution! Sometimes, a complex data access request may be encountered that can not be coded using SQL alone. But, sometimes a view can be created to implement a portion of the access. Then, the view can be queried to satisfy the remainder. Consider the scenario where you want to report on detail information and summary information from a single table. For instance, what if you would need to report on account balance information from an ACCOUNT table similar to the one discussed previously? For each account, provide all column details, and on each row, also report the maximum, minimum, and average balance for that customer. Additionally, report the difference between the average balance and each individual balance. Try doing that in one SQL statement! Instead, you could create a view to solve the dilemma. Consider the following view, BALANCE that creates the maximum, minimum, and average balances by customer:
After the view is created, the following SELECT statement can be issued joining the view to the base table, thereby providing both detail and aggregate information on each report row:
Situations such as these are a great opportunity for using views to make data access a much simpler proposition. The Proliferation Avoidance Rule The second overall rule is the proliferation avoidance rule. It is simple to state and directly to the point: do not needlessly create SQL Server objects that are not necessary. Whenever a SQL Server object is created additional entries are placed in the system catalog tables. Creating needless views (and, indeed any object), causes what I call catalog clutter — entries in the catalog for objects which are not needed or not used. In terms of views, for every unnecessary view that is created SQL Server will insert rows into the following system catalog tables: syscolumns, syscomments, sysdepends, sysobjects, sysprocedures, and sysprotects. If uncontrolled view creation is permitted, disk usage will increase, I/O problems can occur, and inefficient catalog organization may result. The proliferation avoidance rule is based on common sense. Why create something that is not needed? It just takes up space that could be used for something that is needed. The View Synchronization Rule The third, and final view implementation rule is the view synchronization rule. The basic intention of this rule is to ensure that views are kept in sync with the base tables upon which they are based. Whenever a change is made to a base table, all views that are dependent upon that base table should be analyzed to determine if the change would impact them. All views should remain logically pure. The view was created for a specific reason (see the View Usage Rule above). The view should therefore remain useful for that specific reason. This can be accomplished only by ensuring that all subsequent changes that are pertinent to a specified usage are made to all views that satisfy that usage. For example, say a view was created to satisfy an access usage, such as the EMP_DEPTS view discussed earlier. The view was created to provide information about employees and their departments. If a column is added to the EMP table specifying the employee's social security number, it should also be added to the EMP_DEPT view if it is pertinent to that view's specific use. Of course, the column can be added to the table immediately and to the view at the earliest convenience of the development team. The synchronization rule requires that strict change impact analysis procedures be in place. Every change to a base table should trigger the usage of these procedures. Simple SQL queries can be created to assist in the change impact analysis. These queries should pinpoint ad hoc queries, application programs, and analytical queries that could be using views affected by the specific changes to be implemented. View synchronization is needed to support the view usage rule. By keeping views in sync with table changes the original purpose of the view is maintained. View Naming Conventions Views also instigate another area of conflict within the world of SQL Server—that being how to name views. Remember, a view is a logical table. It consists of rows and columns, exactly the same as any other table. A SQL Server view can (syntactically) be used in SQL SELECT, UPDATE, DELETE, and INSERT statements in the same way that a table can. Furthermore, a view can be used functionally the same as a table (with certain limitations on updating as outlined in earlier). Therefore, it stands to reason that views should utilize the same naming conventions as are used for tables. End users querying views need not know whether they are accessing a view or a table. That is the whole purpose of views. Why then, enforce an arbitrary naming standard, such as putting a V in the first or last position of a view name, on views? DBAs and technical analysts, those individuals who have a need to differentiate between tables and views, can utilize the system catalog or system procedures to determine which objects are views and which objects are tables. Most users do not care whether they are using a table or a view. They simply want to access the data. And, in a relational database, tables and views all logically appear to be identical to the end user: collections of rows and columns. Although there are certain operations that can not be performed on certain types of views, users who need to know this will generally be sophisticated users. For example, very few shops allow end users to update any table they want using a query tool (like Forest & Trees or Crystal Reports). Updates, deletions, and insertions (the operations that are not available to some views) are generally coded into application programs to be executed. Most end users need to query tables dynamically. Now you tell me, which name will your typical end user remember more readily when he needs to access his marketing contacts: MKT_CONTACT or VMKTCT01? Do Not Create One View Per Base Table Often times the dubious recommendation is made to create one view for each base table in an application. This is what I call The Big View Myth. The reasoning behind The Big View Myth revolves around the desire to insulate application programs from database changes. Some "experts" believe this insulation can be achieved by mandating that all programs are written to access views instead of base tables. When a change is made to the base table, the programs do not need to be modified because they access a view—not the base table. Although this sounds like a good idea in principle, indiscriminate view creation should be avoided. The implementation of database changes requires scrupulous analysis regardless of whether views or base tables are used by your applications. Consider the simplest type of database change—adding a column to a table. If you do not add the column to the view, no programs can access that column unless another view is created that contains that column. But if you create a new view every time you add a new column it will not take long for your environment to be swamped with views. Even more troublesome is which view should be used by which program? Similar arguments can be made for removing columns, renaming tables and columns, combining tables, and splitting tables. In general, if you follow good SQL Server programming practices, you will usually not encounter situations where the usage of views initially would have helped program/data isolation anyway. By dispelling The Big View Myth you will decrease the administrative burden of creating and maintaining an avalanche of base table views. Always Specify Column Names When creating views SQL Server provides the option of specifying new column names for the view or defaulting to the same column names as the underlying base table(s). It is always advisable to explicitly specify view column names instead of allowing them to default, even if using the same names as the underlying base tables. This will provide for more accurate documentation and easier view maintenance. Code SQL Statements in Block Style All SQL within each view definition should be coded in block style. As an aside, this standard should apply not only to views but also to all SQL statements. Follow these guidelines for coding the SELECT component of your views:
Do Not Encrypt Views
The WITH ENCRYPTION clause can be specified on SQL Server views to encrypt the actual text of the view. When this clause is specified, you can not retrieve the actual SQL used for the view from the system catalog. This is true whether you use sp_helptext or issue a SELECT statement against syscomments. For this reason, unless there is a very compelling security reason, avoid using the WITH ENCRYPTION clause. Encrypted views are very difficult to administer, maintain, and modify. Synopsis Views are practical and helpful when implemented in a systematic and thoughtful manner. Hopefully this article has provided you with some food for thought pertaining to how views are implemented at your shop. And if you follow the guidelines contained in this article, in the end, all that will remain is a beautiful view! | ||||||||||||||||||||||||||||||||||||||||||||||||||||||||||||||||||||||||||||||||||||||||||||||||||||||||||||||||||||||||||||||||||||||||||||||||||||||||||||||||||||||||||||||||||||||||||||||
Wednesday, November 30, 2011
Using Views in Microsoft SQL Server
Modifying Data Through a View
- Syntax:
- Insert data using a view:
INSERT [ INTO ]
view_name
[ ( column1, ... ) ]
VALUES ( value1, ... ) - Update data using a view:
UPDATE view_name
SET column1=value1, ...
[ WHERE condition ] - Remove Data using a view:
DELETE
[ FROM ]
view_name
[ WHERE condition ] - To get information about a view:
sp_helptext view_name - Dependencies of a view:
sp_depends view_name
- Insert data using a view:
- INTO
- An optional keyword used between the INSERT keyword and the name of the view.
- view_name
- The name of the view.
- (column1, ...)
- The list of columns into which values are to be inserted or updated.
- VALUES
- The keyword used just before the list of values.
- (value1, ...)
- The values that are to be inserted or updated, in the columns mentioned.
- SET
- The keyword which specifies the list of columns to be updated.
- WHERE
- The keyword that specifies the conditions that limit the rows to be updated.
- condition
- The condition that determines which rows are to be updated or deleted.
- Views can be used for data modification:
- If the view contains at least one table in the FROM clause of the view definition.
- If no aggregate functions (such as MIN, MAX, AVG, COUNT, SUM, etc.), GROUP BY, UNION, DISTINCT, or TOP clauses are used in the main query. Aggregate functions, however, can be used in a subquery.
- The view has no derived columns (columns derived using operators and functions) in the result set.
Wednesday, November 23, 2011
Customizing Windows Server Backup Schedule
Windows Server Backup (WSB) is the built-in backup solution for Windows Server 2008 that replaces the venerable NT Backup from Windows Server 2003 and before. WSB protects the files and the server os/application binaries within itself as a single-server solution. To consolidate protection across multiple servers or applications like SQL Server, Exchange, SharePoint or Hyper-V, then Microsoft would recommend looking at System Center Data Protection Manager (DPM).By design, WSB ensures that you have recent backups by performing its local backup operations at least once per day. While this is good and recommended there may be reasons specific to your environment where you may want to take backups at a lesser frequency or have multiple backup schedules (e.g. daily and weekly). For example, you may want to backup your files every day, while backing up the system state at lesser frequency say once a week.You can extend the functionality of Windows Server Backup to meet all these advanced needs through simple scripts that uses Windows Server Backup Command Line Tool (WBADMIN) and the Windows Task Scheduler (SCHTASKS).If you are not aware of Task Scheduler, it is a a management application provided in Windows operating systems that allows you to schedule any task for a given set of conditions. Task Scheduler also provides a command line interface (CLI) through the command SCHTASKS.
Samples
The samples here assume the following configuration of the system:· A single disk containing system drive (C:),· Two data volumes (D: and E:)· Dedicated backup volumes (H:, I: and J:).These volume names and parameters are used as boldface in the samples below. Readers can customize them as per their requirements.
Sample 1: Daily Data Volume Backup
The following command will create a Task Scheduler task named DailyVolumeBackup with the start time of 23:00. This task will run DAILY with the HIGHEST privileges. It will run the Windows Server Backup CLI to backup volume E: to target volume H:.Syntax:SCHTASKS /Create /SC DAILY /TN/RL HIGHEST /ST /TR Example:SCHTASKS /Create /SC DAILY /TN DailyVolumeBackup /RL HIGHEST /ST 23:00 /TR "WBADMIN START BACKUP -backupTarget:H: -include:e: -quiet >> C:\backupLogs.txt"
Sample 2 : Weekly Backup of System State
The following command will create a Task Scheduler task named WeeklySystemStateBackup that runs every Saturday (SAT) at 19:00. This task will run WEEKLY with the HIGHEST privileges. It will run the Windows Server Backup CLI to backup SYSTEMSTATEBACKUP to target volume I:.Syntax:SCHTASKS /Create /SC WEEKLY /D/TN /RL HIGHEST /ST /TR Example:SCHTASKS /Create /SC WEEKLY /D SAT /TN WeeklySystemStateBackup /RL HIGHEST /ST 19:00 /TR "WBADMIN START SYSTEMSTATEBACKUP -backupTarget:I: -quiet >> C:\backupLogs.txt "
Sample 3 : Complete System Backup Once in Two Weeks
The following command will create a Task Scheduler task named OnceInTwoWeeksFullBackup that runs every Sunday (SUN) at 1:00 once every 2 weeks. This task will run WEEKLY with the HIGHEST privileges. It will run the Windows Server Backup CLI to backup allCritical volumes to target volume J:.Syntax:SCHTASKS /Create /SC WEEKLY /MO/D /TN /RL HIGHEST /ST /TR Example:SCHTASKS /Create /SC WEEKLY /MO 2 /D SUN /TN OnceInTwoWeeksFullBackup /RL HIGHEST /ST 01:00 /TR "WBADMIN START BACKUP -backupTarget:J: -allCritical -quiet >> C:\backupLogs.txt "
Notes:
-
Above tasks needs to be ran with highest privileges as Windows Sever Backup requires administrative privileges to run. If you are using “Task Scheduler” UI to configure the jobs make sure you use the "[ ] Run with highest priviledges" UI option in the security options of the task.
-
Since WBADMIN command will fail if any other backup job is already running, ensure that the backup jobs are scheduled with a sufficiently long time interval between two jobs.
-
Backups scheduled using windows scheduler (SCHTASKS) will not appear in the Windows Server Backup application user interface.
-
You can use a network location (i.e. \\servername\foldername) as a backup target in above commands. However, network backups will save only the latest version of the backup, deleting the previous version, as multiple versions on the network share are not supported.
-
You can use other WBADMIN CLI options to customize the backup, such as the option vssFull. Please see Windows Server Backup CLI for more details on CLI options.
-
You can use Task Scheduler advance functions like setup additional tasks to run before/after the above jobs. Example of the pre-tasks are disabling an antivirus, closing a service etc. Example of the post-tasks are upload the logs, send an email etc.
-
Since command line interface is interactive in nature and give error/completion information in the console itself, output of all the above invocation should be directed to a log file so that it can be referred in case of any error while running the backup.
-
For optimal storage space utilization on the backup target you can modify the VSS shadow storage using the following command:vssadmin resize shadowstorage /for=
/on= For example: vssadmin resize shadowstorage /for=H: /on=H: /maxsize=UNBOUNDED/maxsize=UNBOUNDED
Friday, November 4, 2011
Use a Built-In Windows Utility to Create Self-Extracting Archives
 Most any savvy computer user is probably pretty handy with a free compression and archiving tool (like, say, 7-Zip), but not everyone they send files to will be. IExpress.exe, a built-in utility you simply type into the "Run" menu in Windows XP or "Start Search" in Vista, can create self-extracting archives to be emailed to anyone using Windows. Just choose "Extract files only" while clicking through the wizard interface, choose the files to be zipped up, and the end user only has to double-click to get them. IExpress also works as an easy way to convert batch files into executables. Need more info on IExpress? Check out Microsoft's help page on the tool.
Thursday, November 3, 2011
Command Line Printer Control
in Windows 2000 / XP
Many, but not all, printer settings can be done from Windows 2000's command line using PRINTUI.DLL and RUNDLL32.EXE.
The list of functions on this page was generated using the following command in Windows 2000 (Professional):
RUNDLL32 PRINTUI.DLL,PrintUIEntry /?| Notes: | (1) | I certainly did not test each of these switches myself! To be honest, I usually prefer to use the (VBScript) printer management scripts that come with Windows 2000 and later ( %windir%\System32\*prn*.vbs). |
| (2) | In Windows 7, PRINTUI.EXE can be used as shorthand for RUNDLL32 PRINTUI.DLL,PrintUIEntry |
Download Microsoft's PrintUI.DLL User's Guide and Reference for more detailed, task oriented explanations of command line options.
Usage:
RUNDLL32 PRINTUI.DLL,PrintUIEntry [ options ] [ @commandfile ]| /a[file] | binary file name | |
| /b[name] | base printer name | |
| /c[name] | unc machine name if the action is on a remote machine | |
| /dl | delete local printer | |
| /dn | delete network printer connection | |
| /dd | delete printer driver | |
| /e | display printing preferences | |
| /f[file] | either inf file or output file | |
| /ga | add per machine printer connections | |
| /ge | enum per machine printer connections | |
| /gd | delete per machine printer connections | |
| /h[arch] | driver architecture, one of the following:Alpha | Intel | Mips | PowerPC | |
| /ia | install printer driver using inf file | |
| /id | install printer driver using add printer driver wizard | |
| /if | install printer using inf file | |
| /ii | install printer using add printer wizard with an inf file | |
| /il | install printer using add printer wizard | |
| /in | add network printer connection | |
| /j[provider] | print provider name | |
| /k | print test page to specified printer, cannot be combined with command when installing a printer | |
| /l[path] | printer driver source path | |
| /m[model] | printer driver model name | |
| /n[name] | printer name | |
| /o | display printer queue view | |
| /p | display printer properties | |
| /q | quiet mode, do not display error messages | |
| /r[port] | port name | |
| /s | display server properties | |
| /Ss | Store printer settings into a file | |
| /Sr | Restore printer settings from a file | |
| Store or restore printer settings option flags that must be placed at the end of command: | ||
| 2 | PRINTER_INFO_2 | |
| 7 | PRINTER_INFO_7 | |
| c | Color Profile | |
| d | PrinterData | |
| s | Security descriptor | |
| g | Global DevMode | |
| m | Minimal settings | |
| u | User DevMode | |
| r | Resolve name conflicts | |
| f | Force name | |
| p | Resolve port | |
| /u | use the existing printer driver if it's already installed | |
| /t[#] | zero based index page to start on | |
| /v[version] | driver version, one of the following:Windows 95 or 98 | Windows NT 3.1 | Windows NT 3.5 or 3.51 | Windows NT 3.51 | Windows NT 4.0 | Windows NT 4.0 or 2000 | Windows 2000 | |
| /w | prompt the user for a driver if specified driver is not found in the inf | |
| /y | set printer as the default | |
| /Xg | get printer settings | |
| /Xs | set printer settings | |
| /z | do not auto share this printer | |
| /Z | share this printer, can only be used with the /if option | |
| /? | help this message | |
| @[file] | command line argument file | |
Examples:
- Run server properties:
- RUNDLL32 PRINTUI.DLL,PrintUIEntry /s /t1 /n\\machine
- Run printer properties
- RUNDLL32 PRINTUI.DLL,PrintUIEntry /p /n\\machine\printer
- Run add printer wizard localy
- RUNDLL32 PRINTUI.DLL,PrintUIEntry /il
- Run add printer wizard on \\machine
- RUNDLL32 PRINTUI.DLL,PrintUIEntry /il /c\\machine
- Run queue view
- RUNDLL32 PRINTUI.DLL,PrintUIEntry /o /n\\machine\printer
- Run inf install
- RUNDLL32 PRINTUI.DLL,PrintUIEntry /if /b "Test Printer" /f %windir%\inf\ntprint.inf /r "lpt1:" /m "AGFA-AccuSet v52.3"
- Run add printer wizard using inf
- RUNDLL32 PRINTUI.DLL,PrintUIEntry /ii /f %windir%\inf\ntprint.inf
- Add per machine printer connection
- RUNDLL32 PRINTUI.DLL,PrintUIEntry /ga /c\\machine /n\\machine\printer /j"LanMan Print Services"
- Delete per machine printer connection
- RUNDLL32 PRINTUI.DLL,PrintUIEntry /gd /c\\machine /n\\machine\printer
- Enumerate per machine printer connections
- RUNDLL32 PRINTUI.DLL,PrintUIEntry /ge /c\\machine
- Add printer driver using inf
- RUNDLL32 PRINTUI.DLL,PrintUIEntry /ia /c\\machine /m "AGFA-AccuSet v52.3" /h "Intel" /v "Windows 2000" /f %windir%\inf\ntprint.inf
- Remove printer driver
- RUNDLL32 PRINTUI.DLL,PrintUIEntry /dd /c\\machine /m "AGFA-AccuSet v52.3" /h "Intel" /v "Windows 2000"
- Set printer as default
- RUNDLL32 PRINTUI.DLL,PrintUIEntry /y /n "printer"
- Set printer comment
- RUNDLL32 PRINTUI.DLL,PrintUIEntry /Xs /n "printer" comment "My Cool Printer"
- Set printer port
- RUNDLL32 PRINTUI.DLL,PrintUIEntry /Xs /n "printer" PortName "port:"
- Get printer settings
- RUNDLL32 PRINTUI.DLL,PrintUIEntry /Xg /n "printer"
- Get printer settings saving results in a file
- RUNDLL32 PRINTUI.DLL,PrintUIEntry /f "results.txt" /Xg /n "printer"
- Set printer settings command usage
- RUNDLL32 PRINTUI.DLL,PrintUIEntry /Xs /n "printer" ?
- Store all printer settings into a file
- RUNDLL32 PRINTUI.DLL,PrintUIEntry /Ss /n "printer" /a "file.dat"
- Restore all printer settings from a file
- RUNDLL32 PRINTUI.DLL,PrintUI /Sr /n "printer" /a "file.dat"
- Store printer information on level 2 into a file
- RUNDLL32 PRINTUI.DLL,PrintUIEntry /Ss /n "printer" /a "file.dat" 2
- Restore from a file printer security descriptor
- RUNDLL32 PRINTUI.DLL,PrintUIEntry /Sr /n "printer" /a "file.dat" s
- Restore from a file printer global devmode and printer data
- RUNDLL32 PRINTUI.DLL,PrintUIEntry /Sr /n "printer" /a "file.dat" g d
- Restore from a file minimum settings and resolve port name
- RUNDLL32 PRINTUI.DLL,PrintUIEntry /Sr /n "printer" /a "file.dat" m p
More to explore:
Microsoft Knowledge Base articles: How to add printers with no user interaction in Windows XP and How to add printers with no user interaction in Windows (2000/2003).
How to print files from the command line (or batch files).
An overview of Registry Entries for Printing by Microsoft.
If RUNDLL32 just won't do the job:
Sometimes we need to do just alittle more than RUNDLL32 is capable of, like installing a TCP/IP printer port.
In that case, consider buying yourself a copy of the Windows 2000 Server/Windows Server 2003 Resource Kit and use PRNADMIN.DLL and the accompanying sample scripts written in VBScript.
In that case, consider buying yourself a copy of the Windows 2000 Server/Windows Server 2003 Resource Kit and use PRNADMIN.DLL and the accompanying sample scripts written in VBScript.
My own AddIPPrn.bat uses these VBScripts to install a printer, its driver and a TCP/IP printer port on a remote computer.
If all you need is to backup/restore, clone or migrate existing printers:
Often the printer configurations of existing computers need to be cloned to other computers, or restored after reinstalling Windows.
In those cases, a backup/export and restore/import with Microsoft's PrintMig 3.1 may be the best (and easiest) solution.
Though earlier versions of PrintMig were GUI only, version 3.1 can also be run without user interaction from the command line or in a batch file:
In those cases, a backup/export and restore/import with Microsoft's PrintMig 3.1 may be the best (and easiest) solution.
Though earlier versions of PrintMig were GUI only, version 3.1 can also be run without user interaction from the command line or in a batch file:
Microsoft (R) Windows (TM) Printer Migrator 3.1
Copyright (C) 1997-2002 Microsoft Corp. All rights reserved

usage: PRINTMIG [options] [server]
       [-?] Display this message
       [-b] Backup - followed by CAB file name
       [-r] Restore - followed by CAB file name
       [-l] Attempt to convert LPR Ports to SPM
       [-i] Suppress warning popups.  Info still written to log file.

If server is not specified then the local machine is implied.

Example command line to restore an existing config to a server:
  printmig -r d:\print\ps1.cab \\prt-srvr1

Example command line to backup a server to the specified file:
  printmig -b "\\filesrv\store\print server 2.cab" \\prt-srvr2
PrintMig can be used for Windows (Server) 2000, XP and Server 2003.
For Windows 7 and Windows Server 2008, use the Printer Backup Recovery Migration tool (PRINTBRM) instead.
PRINTBRM is a great (native) command line tool to backup/restore and migrate printers.
For Windows 7 and Windows Server 2008, use the Printer Backup Recovery Migration tool (PRINTBRM) instead.
PRINTBRM is a great (native) command line tool to backup/restore and migrate printers.
Its command line couldn't be any simpler.
To backup:
To backup:
%windir%\System32\Spool\Tools\PrintBRM -s \\sourcecomputername -b -f filename.printerExport
And to restore:
%windir%\System32\Spool\Tools\PrintBRM -s \\destinationcomputername -r -f filename.printerExport
For more help:
%windir%\System32\Spool\Tools\PrintBRM /?
Export printer drivers:
With Microsoft's PrintMig tool you can create backups of your complete set of printers, ports, drivers, print processors and print monitors.
Unfortunately there is no way to selectively backup nor restore, so you may want to backup a clean test system with just the printers and components you need to migrate.
Unfortunately there is no way to selectively backup nor restore, so you may want to backup a clean test system with just the printers and components you need to migrate.
If you need to migrate a single printer, use my ExpPrnDr.bat (Export Printer Driver) instead.
It uses Microsoft's DEVCON.EXE to list all files belonging to a specific printer driver, and
It uses Microsoft's DEVCON.EXE to list all files belonging to a specific printer driver, and
PRINTUI.DLL to install that printer driver on any computer.
Subscribe to:
Posts (Atom)