Monday, September 21, 2015

How to Install Apache on CentOS 7


How to Install Apache on CentOS 7

Pre-Flight Check
  • These instructions are intended for installing Apache on a single CentOS 7 node.
  • I’ll be working from a Liquid Web Self Managed CentOS 7 server, and I’ll be logged in as non-root user. 
Step 1: Install Apache
First, clean-up yum:
sudo yum clean all
As a matter of best practice we’ll update our packages:
sudo yum -y update
Installing Apache is as simple as running just one command:
sudo yum -y install httpd
Step 2: Allow Apache Through the Firewall
Allow the default HTTP and HTTPS port, ports 80 and 443, through firewalld:
sudo firewall-cmd --permanent --add-port=80/tcp
sudo firewall-cmd --permanent --add-port=443/tcp
And reload the firewall:
sudo firewall-cmd --reload
Step 3: Configure Apache to Start on Boot
And then start Apache:
sudo systemctl start httpd
Be sure that Apache starts at boot:
sudo systemctl enable httpd
To check the status of Apache:
sudo systemctl status httpd
To stop Apache:
sudo systemctl stop httpd
Single User Mode in CentOS 7 / RHEL 7


Single User Mode in CentOS 7 / RHEL 7

CentOS 7
Single user mode is the one of the Run level in the Linux operating system, Linux operating system has 6 run levels that are used for different requirement or situation. Single user mode mainly used for doing administrative task such as cleaning the file system, Managing the quotas, Recovering the file system and also recover the lost root password. In this mode services won’t start, none of the users are allowed to login except root and also system won’t ask for password to login.
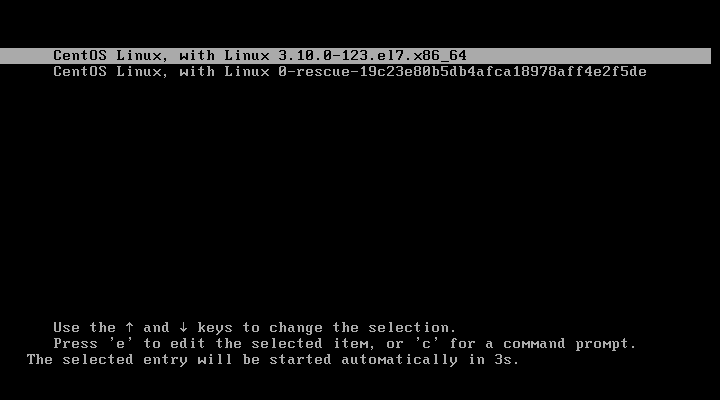
Step 1: While booting you might see the splash screen like below, grub is counting the time to boot the default operating system as mentioned in /etc/grub2.cfg; this time press any key to interrupt the auto boot.
CentOS 7 - Reset root Password Autoboot
CentOS 7 – Reset root Password Auto boot
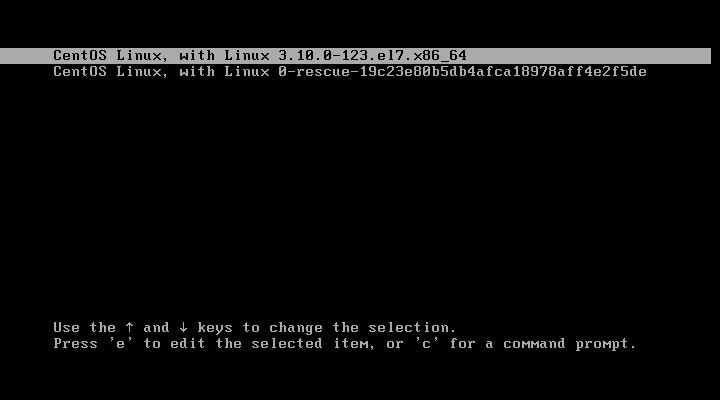
Step 2: It will list operating systems (in my case only CentOS installed) that you have installed on the machine, In below that you might find some information about booting the OS and editing the parameters of menu. If you want to enter into single user mode; select the operating system and press “e” edit arguments of kernel.
CentOS 7 - Reset root password - Select Kernel
CentOS 7 – Reset root password – Select Kernel
Step 3: Once you have pressed, you should see the information about the selected operating system. It gives you the information about the hard disk and partition where the OS installed, location of the kernel, language, video output, keyboard type, keyboard table, crash kernel and initrd (Initial ram disk).
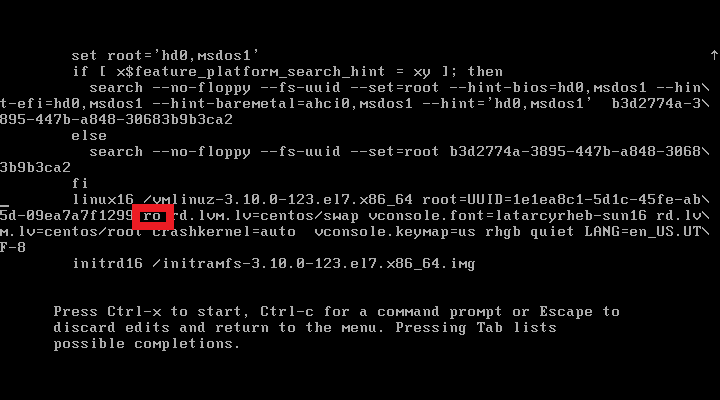
To enter into single user mode; Go to second last line (Starts with linux 16 or linuxefi) using up and down arrow then  modify the ro argument.
CentOS 7  - Reset root password - Before changing Kernel Argument RO
CentOS 7 – Reset root password – Before changing Kernel Argument
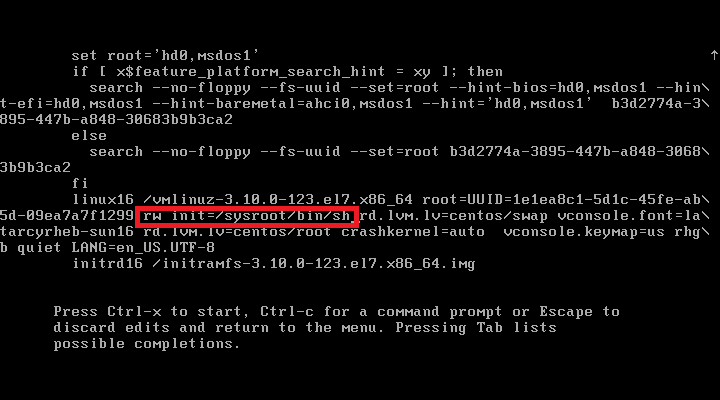
Step 5: Modify it to “rw init=/sysroot/bin/sh”. Once done, press “Ctrl+x”
CentOS 7  - Reset root password - After changing Kernel Argument
CentOS 7 – Reset root password – After changing Kernel Argument
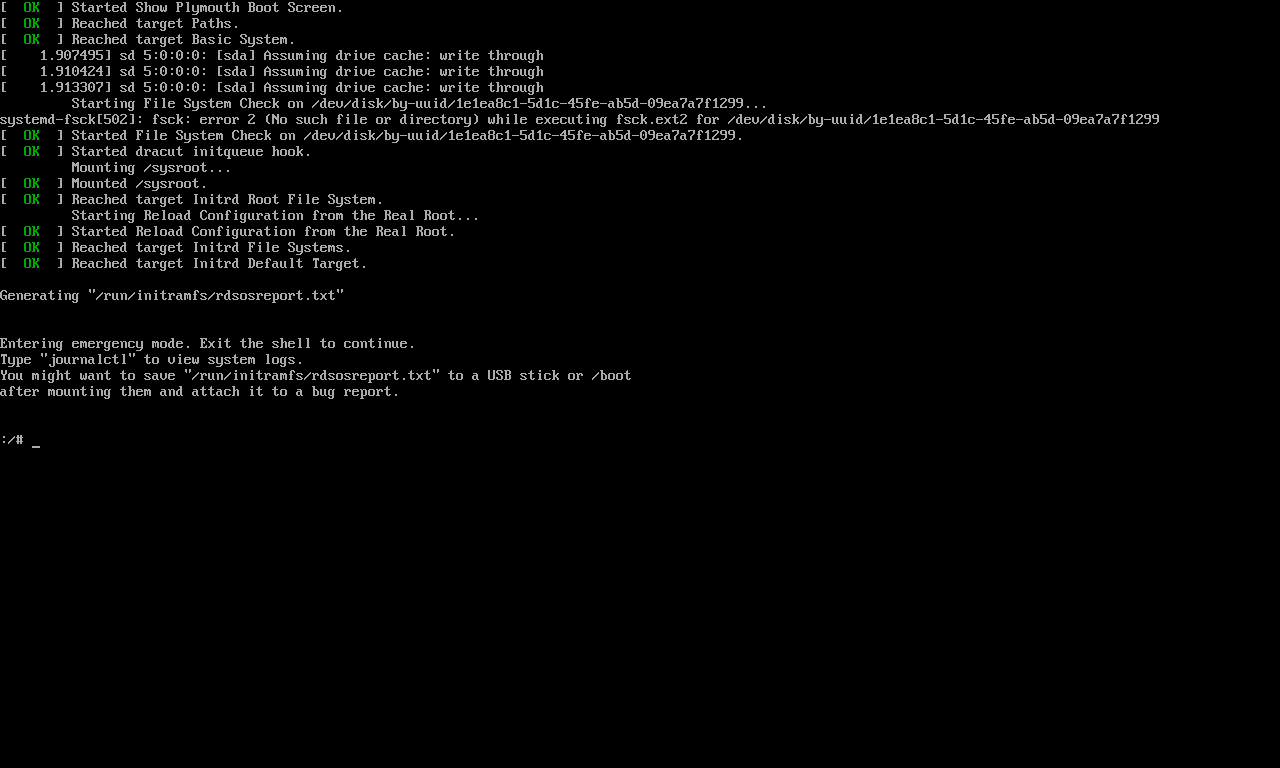
Now you should be in command line mode with root privileges (without entering password). Now you can start to troubleshoot your system or can do maintenance of your system.
CentOS 7 - Single user mode
CentOS 7 – Single user mode
chroot to access your system.
chroot /sysroot
That’s all, You must chroot to reset root password in CentOS 7 / RHEL 7